π
2025-01-18 01:01
in Clubbing, Electronics
So, you would think that as part of my complicated LED outfit that was several years of work over the years including over 10,000 lines of code, the shoes would not be a big deal...
Well, after having gone through more than 10 different pairs of LED shoes that all failed in various ways, I have to say that these were more trouble than expected. Issues:the early ones had wires or PCB between the pixels that would break after the shoe was bent many times as part of walking/dancing
later ones fixed this, but still used the same small module with limited battery life, barely good enough for 4H
even unmodified, the LED module resin would eventually crack, and usually the battery fail
worst failure was a lipo that did fail in a way that it smoked/burnt, not great under your feet (thankfully this was contained and my foot was ok)
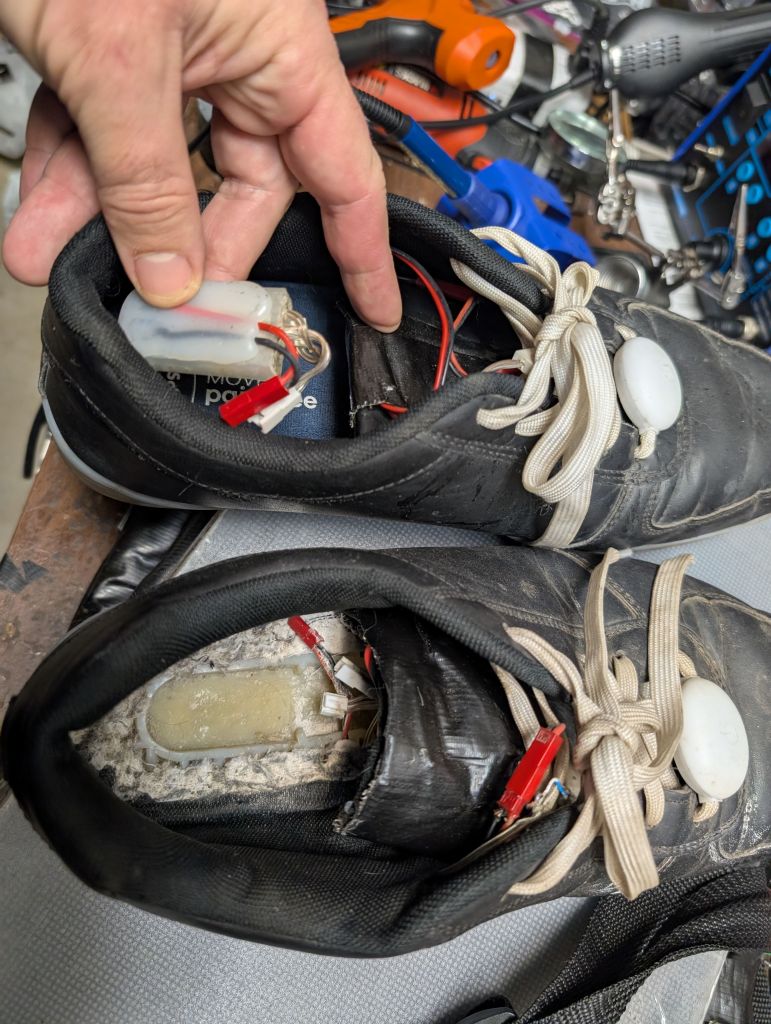
the only way to add battery life was to solder a connector to the lipo pins inside the module, which is a bit tricky (getting a good sodler joint) and not getting that connection to fail later, which with dancing does happen too often* then, my first design which included adding a 2nd battery inside the shoe, turned out to be a mistake as the 2nd battery was not protected well and would eventually be breached. Also the thin wires for the orignal batteries I used woudl also fail:
This felt like a good idea, but first I had to add diodes to drop 0.7V so as not to exceed 4.3V for a direct connection to the lipo (as a remminder, I cannot connect via the USB plug as if you send power there, the shoe does in charging mode and stops lighting up), but then I found out that my neopixel strips did not actually have 5V at the end due to line loss, and it was going to be complex to safely connect them to my shoes without a voltage regulator and more electronics, making the whole thing, questionable. Still, it was a tempting idea for a short while to use my mega battery pack to power the shoes forever ;)
at least it's pretty
Well, after having gone through more than 10 different pairs of LED shoes that all failed in various ways, I have to say that these were more trouble than expected. Issues:

I had to melt the resin until I could expose the power pins

looked ok on the bench, did not work long in the shoe

shoving the battery in was not easy

it worked on the bench, but didn't work too long in real life, by then I added an external lipo plug to check the voltage and do fast charge, bypassing USB
This felt like a good idea, but first I had to add diodes to drop 0.7V so as not to exceed 4.3V for a direct connection to the lipo (as a remminder, I cannot connect via the USB plug as if you send power there, the shoe does in charging mode and stops lighting up), but then I found out that my neopixel strips did not actually have 5V at the end due to line loss, and it was going to be complex to safely connect them to my shoes without a voltage regulator and more electronics, making the whole thing, questionable. Still, it was a tempting idea for a short while to use my mega battery pack to power the shoes forever ;)
Of course, it's all nice and good until something shorts. Thankfully my foot didn't catch fire:


at least it's pretty
A big thanks to IGxx for nicely sending me extra modules so I could hack on them and have spares. Here is the shoe I recommend you buy today: https://www.amazon.com/gp/product/B07GS6GSRY/ref=ppx_yo_dt_b_search_asin_title?ie=UTF8&psc=1 This is the new shoe with the updated module. Very pretty shoe, but otherwise the modules still have the same 4h runtime, and still need the same work, bummer:


battery goes up there so it's not stepped on
See more images for Extended Festival LED Shoes Version 4
")


