Thinkpad P73 vs P70, not a win all around: only one 2.5" drive instead of 2, and a badly designed power system
So, when lenovo came out with the Thinkpad P70, I wasn't very happy because if you had a 90W power supply, it refused to charge from it, at any rate whatsoever. I was not impressed, but eh, at least it would still power the laptop so that its batteries didn't go flat while plugged in.Well, leave it to lenovo engineers to make things worse the for the P73. The minimum power supply was raised from 135W (170W recommended) to 170W (230W recommended) which is understandable, but lenovo decided to ensure that the laptop will not take any power from any power supply that does not identify itself as 170W or more. This means that even ifit only needs 40W to sustain itself without digging into the batteries, it will completely refuse to use a 90W or even 135W power supply for anything at all, and kill the battery instead. Lenovo, you just plain suck, there is no excuse for this.

P70 vs P73, they look pretty similar
See tlp issue 494 for details on how to setup tlp to run in low power mode when power is plugged in. Another disappointment is that the P73 is mostly the same size and weight than the P70, but it has less room for storage. It has a bunch of empty spaces that aren't used for anything, and it can't use two 2.5" SATA drives anymore, like the P70 could. Worse, the now single 2.5" slot uses a lenovo only ribbon cable that does not ship with the laptop and basically means you cannot even add a 2.5" drive without that special ribbon cable, which isn't in stock yet. Well done... Ah yes, the battery is also not hot swappable, even if it is replaceable (unlike a Mac laptop where everything is sealed shut).
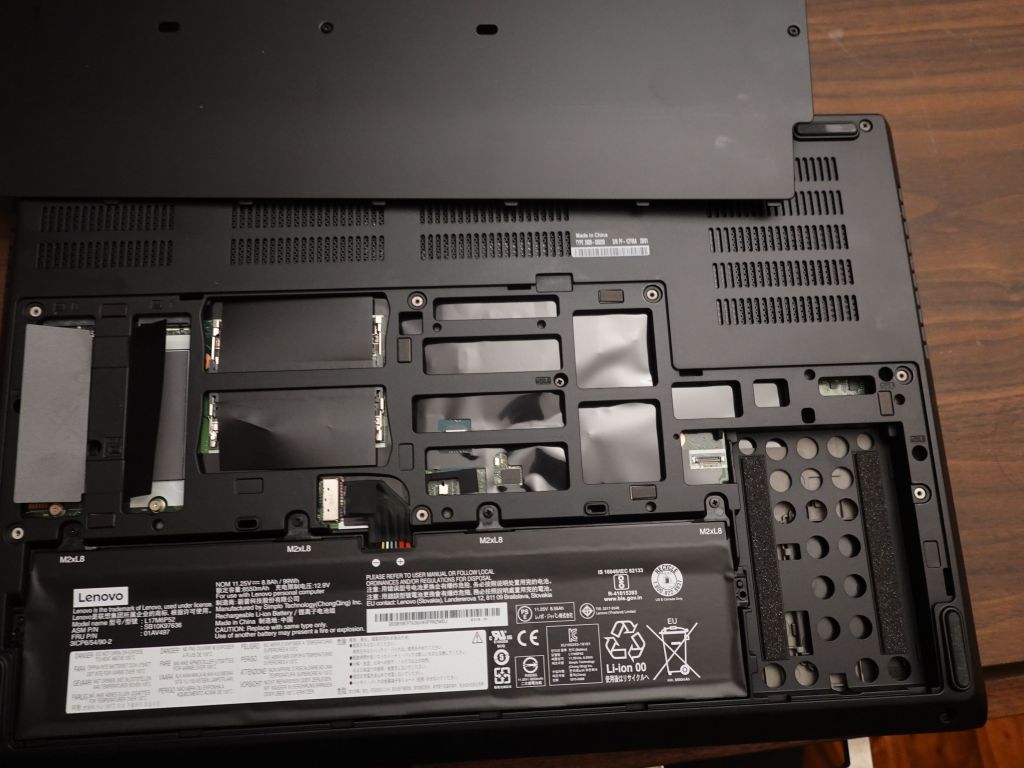

this shows the unobtanium lenovo cable for the now only single drive that fits, along the unused space
Ok, stop complaining, just buy a bunch of 170w or 230W power supplies and move on with your life
Well, yes and no:Tricking the P70 and P73 into accepting a power supply it wouldn't otherwise use
Lenovo uses the a center pin resistor to know how much power they can draw from the power supply, see: http://www.thinkwiki.org/wiki/Power_Connector . For the P70, I built this power supply adapter with a resistor bridge to tell the laptop how big it should think the power supply, is:
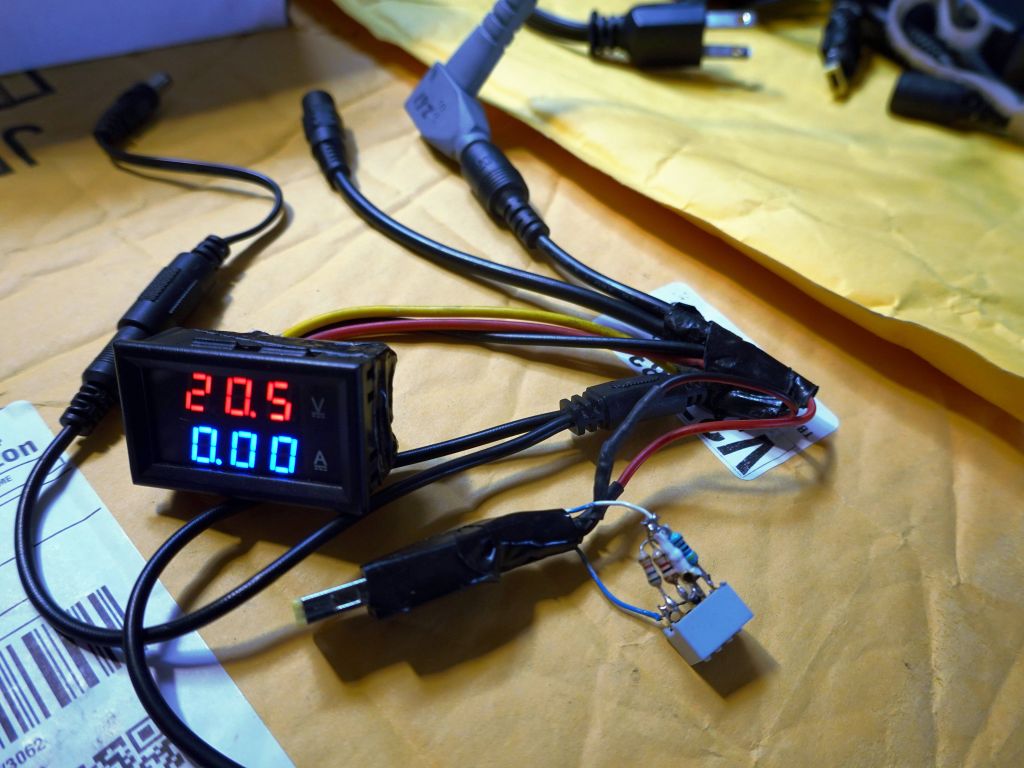
- 230W works fine   4.6k => I have seen power supplies work with 170W but fail at 230W, so the laptop does draw more
- 170W works ok     1.9k (1.8k also ok)
- 130W rejected     1k
- 90W  rejected     550
The rejected power supplies will be used to charge the laptop if it is shutdown, but they will not be used in any way otherwise. On the P70 the laptop would at least use the power supply to keep the laptop alive, and use half battery half external power supply. Not so with the P73, it just ignores it entirely.
This is utter bullshit as I have plenty of 90W power supplies, including 12V car converters, or a 90W external 20V battery pack I can't use anymore. You can go read my Hacking a thinkpad slim tip adapter to output more than 90W (required to charge a Thinkpad P70) page for details, including this nice battery pack I couldn't use anymore:
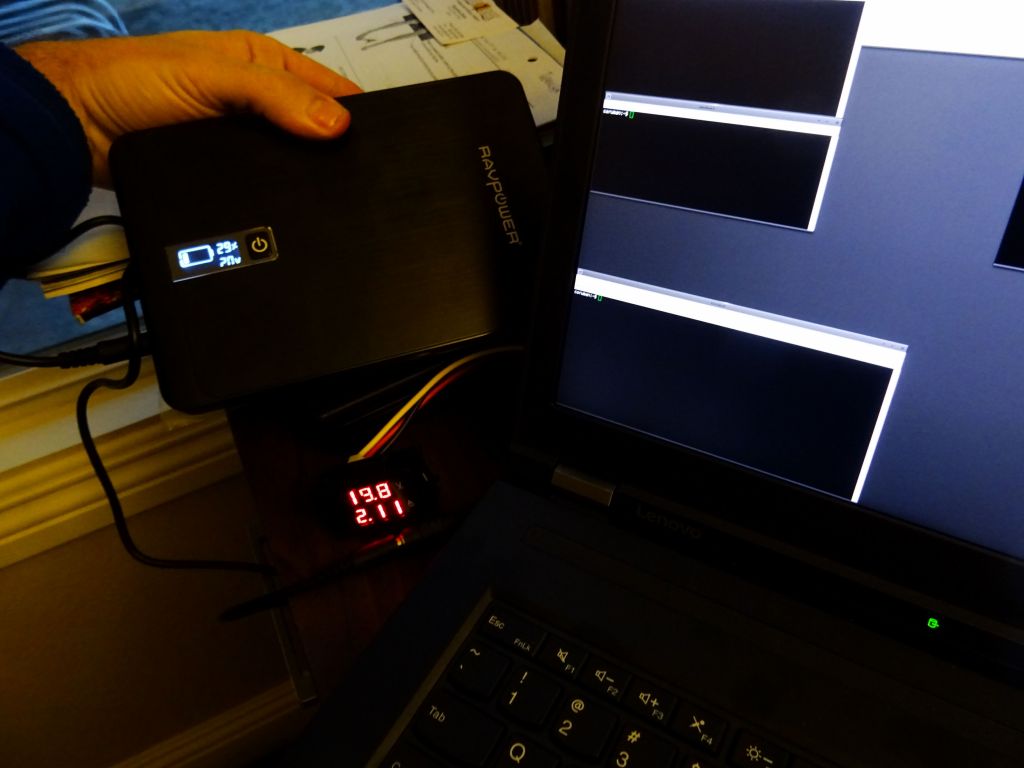
If you scroll to the bottom of the page, you'll also see a terrible buffer lipo hardware hack I did that allows to use the battery pack with higher amp draws, but it's a bit ridiculous (and bulky).
See tlp issue 494 for details on how to setup tlp to run in low power mode when power is plugged in. Without the tlp hack or the buffer lipo hack, when I lie to the laptop and tell it is connected to a a bigger power supply, manage power draw with what I run, and disable battery charging in software, but the laptop will still draw the power supply for over 100W when you plug it in for a fraction of a second, and refuse it if the voltage drops.
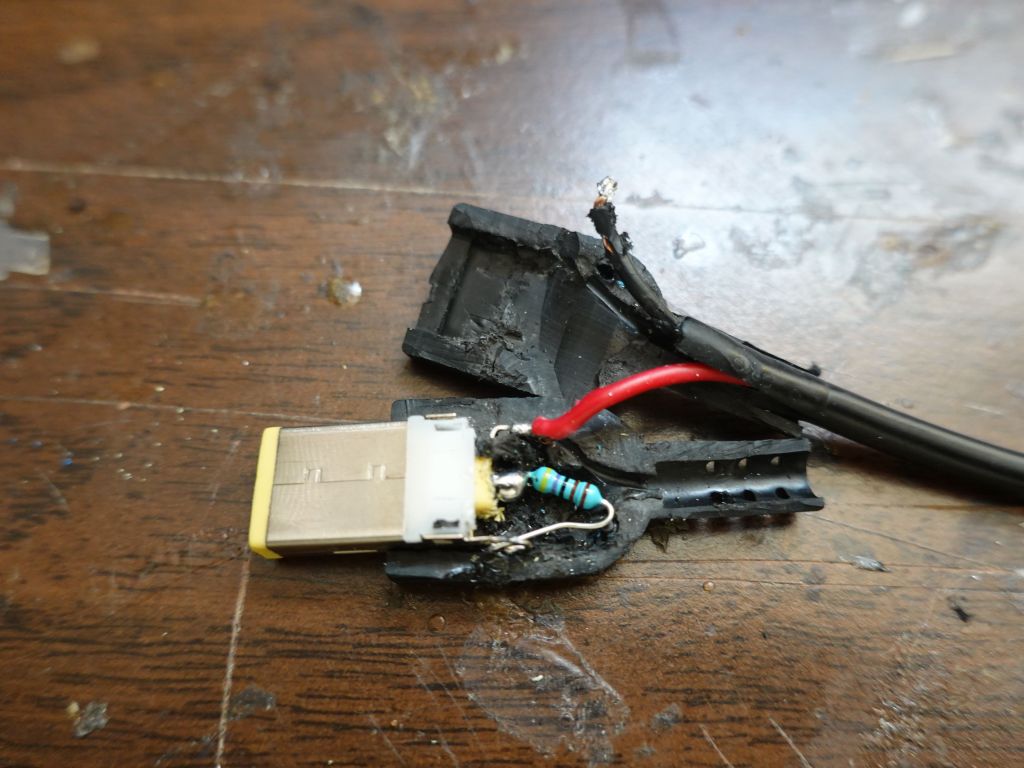
Obviously this would not be a problem if the laptop simply had a 90W power supply mode where it throttle things down and turned off battery charging. This is mostly what the P70 does. In the meantme, on top of hacking my power supplies, I also made this for my laptop, it looks silly and makes the thinkpad not look like a professional laptop, but well, that's lenovo's fault:


this takes any power supply and replaces the center tip resistor with a 1.9k one to emulate a 170W power supply
Making a Thinkpad P73 compatible external battery pack
I did some testing and confirmed that the laptop is very picky about power supplies. It even rejects a 19.7V 20A power supply I had, because it's 19.8V and not 20V. Same thing for amps, it needs to be able to draw maybe around 5A for a short time to accept the power supply (they sure are putting a lot of effort into making sure the power supply is not under-spec'ed). Prototype with 150W step up converter which takes my 16V lipo to 20V while delivering enough amps to make the laptop happy:
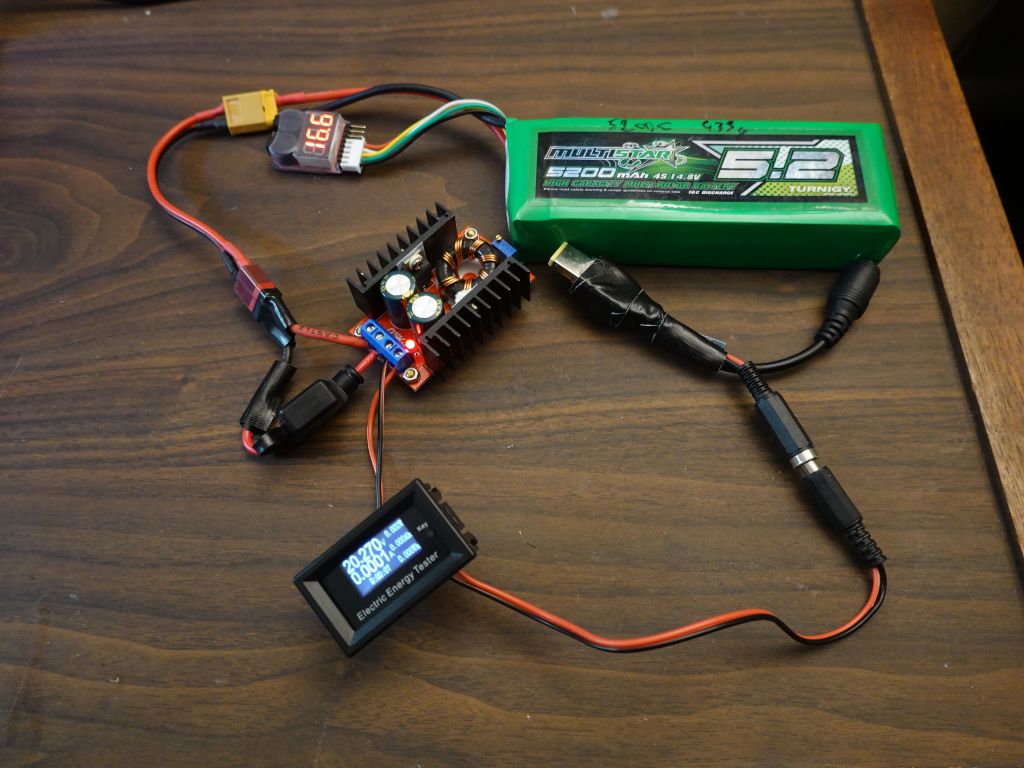

it works, and the laptop thinks it's connected to a 230W power supply thanks to the center pin resistor.

this works in theory, but the lipo charger is quite slow and wouldn't keep up for long, but I made a better version shown lower down
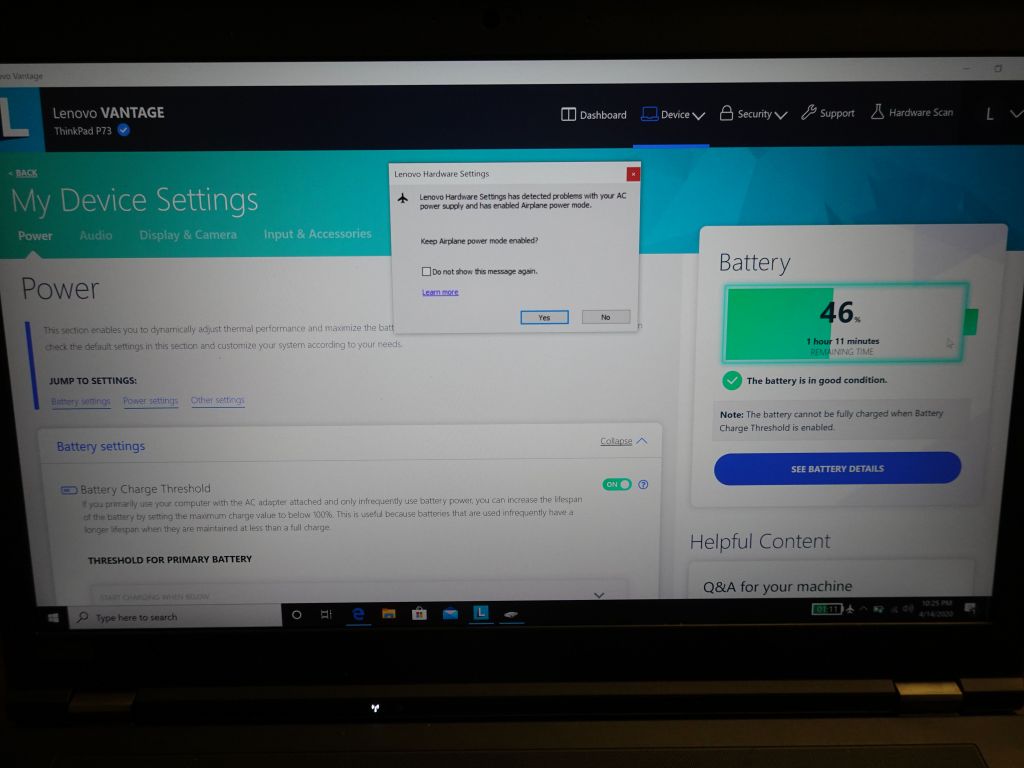
Lenovo's P73 airplane mode simply stops using the external power supply and reverts to batteries. Sigh...
Oh yes, let's talk about airplane mode. The lenovo engineers thought of everything: if they detect that the power supply drops a few times in a row, they offer a nice setting which is supposed to make the plane more airplane friendly. How friendly you ask? Well, you could throttle down the CPUs, disable battery charging, do smart stuff like that. Or, if you're lenovo, you can have airplane mode simply refuse to use the power supply altogether. Thank you lenovo, you wrote a feature that saves me the trouble of unplugging an otherwise perfectly good power supply that you refuse to use (to be super clear, my 230W power supply is plugged in and airplane mode just disabled it):
Making a battery pack to act both as buffer for a smaller power supply, and as emergency external power (even power the laptop from 12v)
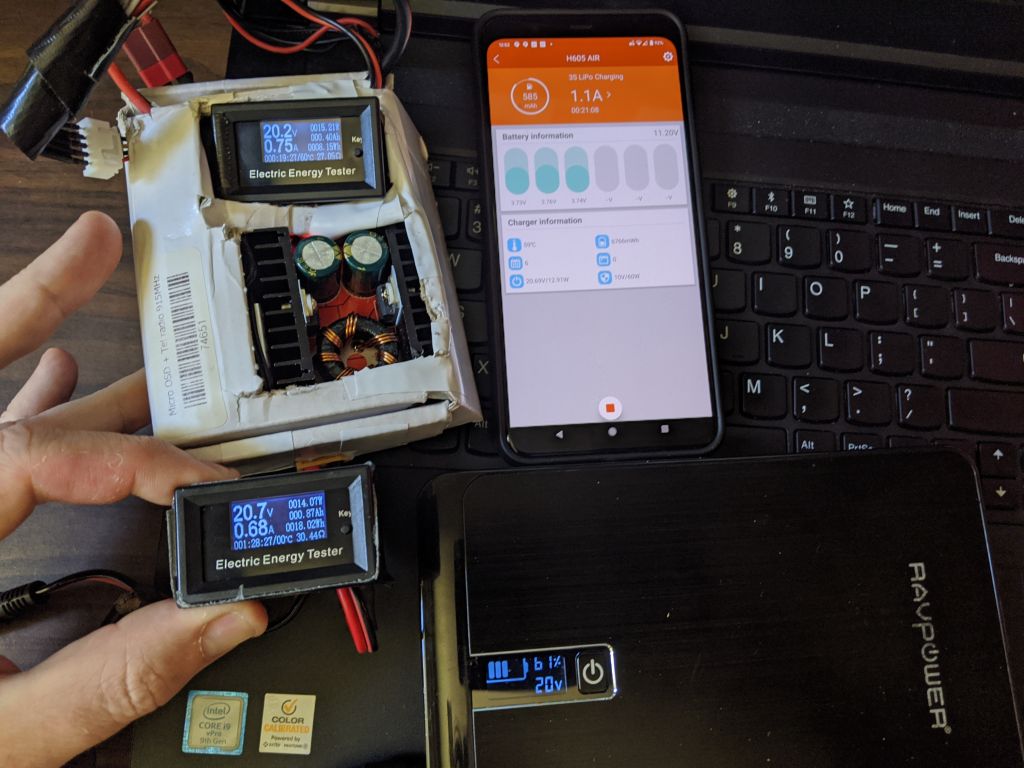
Anyway, back to the battery pack, I found the ISDT H605 Air lipo charger which is small enough and can charge the lipo at 5A, which should be enough to keep up with the laptop when not doing CPU crazy stuff. This also allows using a 12V power supply or a lower wattage lenovo power supply to recharge the pack while it's in use, or not:

version 1 was a bit bigger than I wanted, 90W power supply shown for scale

here, the 90W power supply is recharging the battery at 2.5A while it's being discharged at 3A on the output side, using the battery as buffer
")
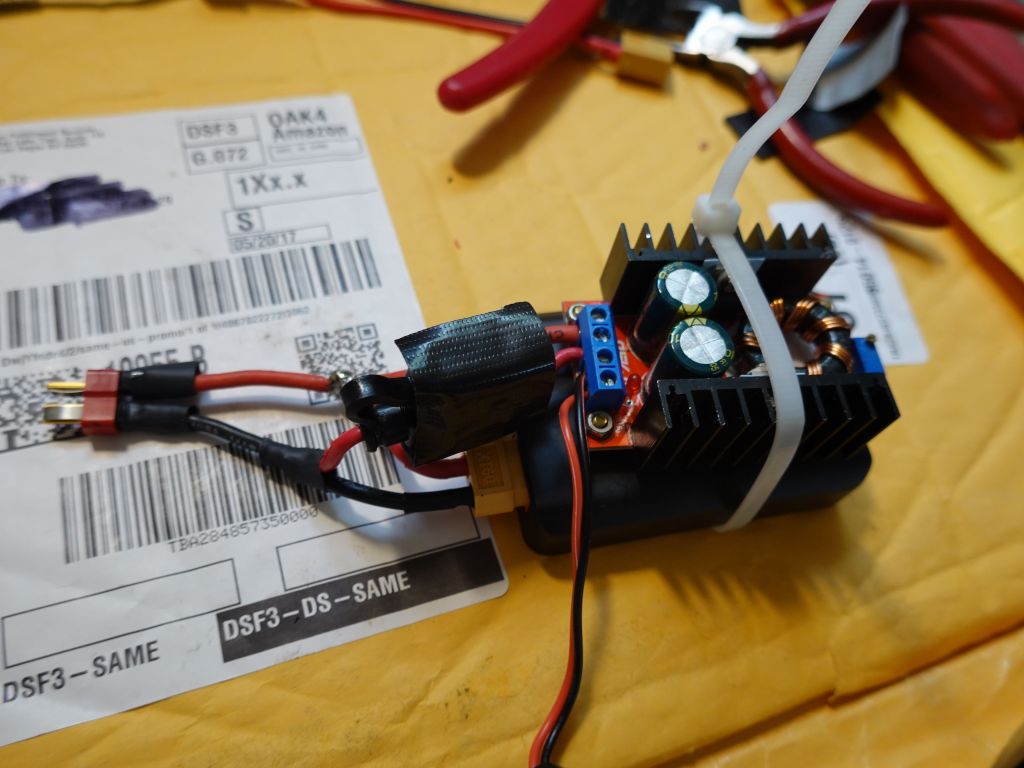
I made version 3 a bit smaller, with a built in 12V lipo to act as buffer for a smaller power supply. Yes, it's a beautiful piece of art, I know :)
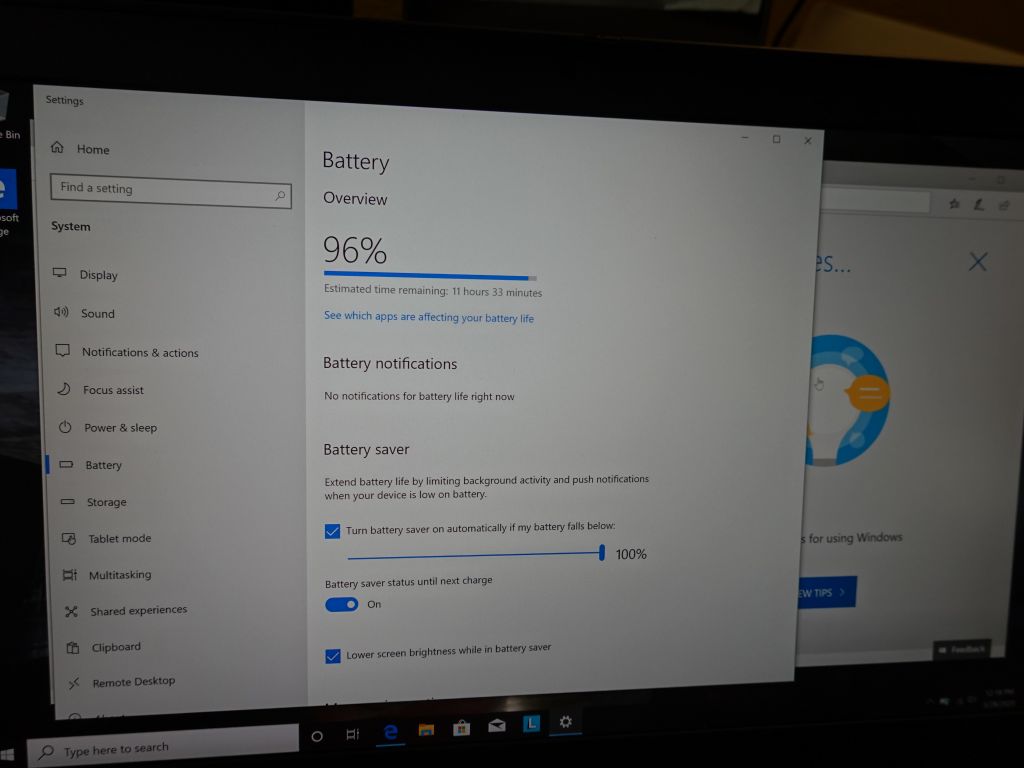
 is not bad for a laptop that big")
7.3W with the screen off (and around 10W with wifi off and the screen on low dim) is not bad for a laptop that big
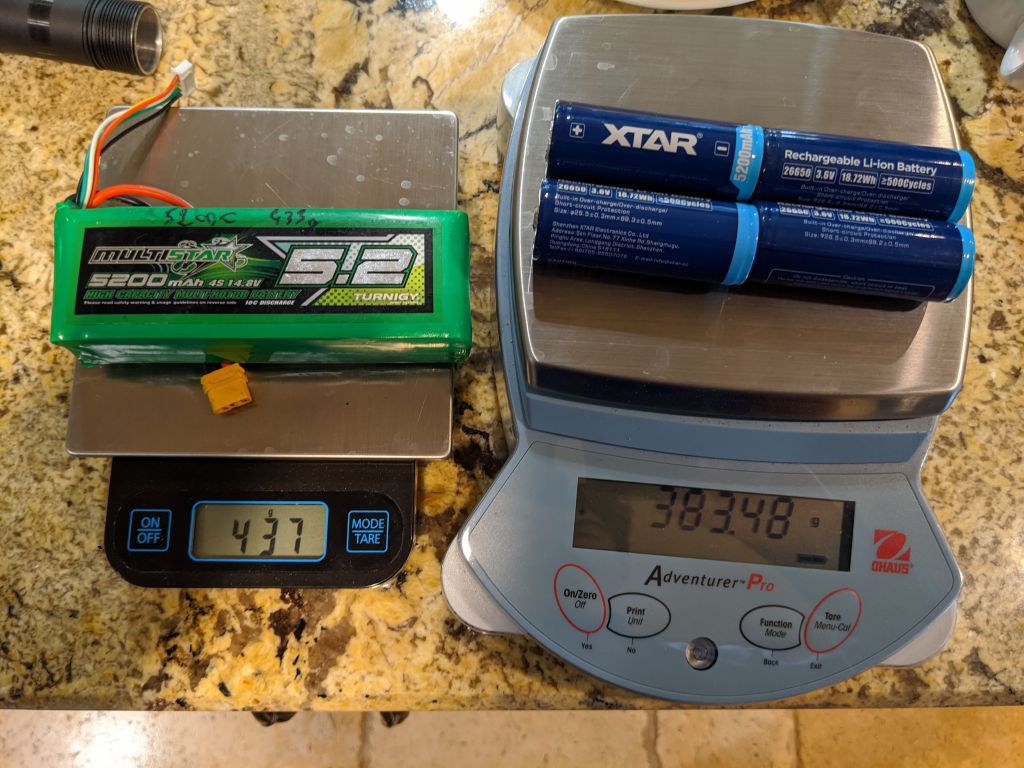
4S Lipo vs 4x 18650 or 26650 batteries
I do have a few lipos laying around, so that's free energy for my laptop if I'm willing to carry them. I have however found that for higher draws, the step up converter doesn't quite keep up at 20V/5A+ with just 12V input (3S), but is fine with 16V input (4S):


, not working (right), and after (left)")


")


")


